Thursday, 14 June 2012

A Sugar Paste Lady

So this week's lesson was about making a little model of a woman.

In one of the lessons a couple of weeks back we used moulds to make the body, head and hands so the paste had plenty of time to dry.

Creepy, huh? I took this picture after painting one of the eyes.


Then we painted details on the face with colours. Mine ended up looking a little gothic. :-)

The legs were actually a cone with sugar paste draped around it for a skirt - the body, which was on a cocktail stick, was then pushed into this, and more paste rolled out made a top. Arms were stuck on with sugar paste that had been 'let down' (no, I didn't make it a promise I couldn't keep! It's a bit like making slurry out of clay, add water until it becomes like a glue) and hands pushed into the ends of the arms.

Finally, I had my first go at using a clay gun! It was awesome and now I want to buy one. If you ever loved making things in the Play-Doh Factory as a kid, you'll love one of these:

Picture from icingonlinestore.com (I don't have a picture of one..)

The clay gun was for hair. Had a good tip from the tutor on this as well which seems obvious but I wouldn't have thought of it; don't just stick the hair to the top of the head, start from the bottom of the back and work your way up and around the sides. Gives a better finish. She was right as well.

I finished my lady off with a little hand bag made of modelling paste. Here she is:

OK, so I went a little heavy on the eye make-up. But have you any idea how fiddly it is? :-)

Wednesday, 16 May 2012

Shoes, Poppies and more

Hi all, sorry for the big gap since the last post. I'd like to say I've been really busy but, while I have been busy, I've also had plenty of opportunities to write a new post. And I haven't.

So anyway, sorry.

So I've had two more classes since I last wrote. One focused on shoes, and the other on poppies. I've also found that the longer the course goes on, the more expensive it seems to be getting, as we need to bring all our own equipment which seems to include all these things I've never even heard of, let alone own. Like flower tape, which is this strange stuff actually used by florists mostly I think (or maybe that was just the wire) but is used by cakey people too now apparently. The reason I say it is strange is because it's not sticky until you stretch it to activate the glue, and even then I can't feel any stickiness on it, but it seems to stick to itself OK, so there you go. I made the mistake in the poppy class of taking a length of tape and then cutting it from the roll and leaving it on the table to come back to when I needed it. The trouble with that is I then didn't know which was the sticky side!

But I digress; I meant to start with the shoes.

I quite enjoyed these actually. I didn't buy any shoe cutters, I borrowed the teacher's (seems so odd saying that, like I really am back at school) but I think I might go out and get some. Turns out you can also do a lot of them just with circle cutters, like these:

How cute is that?!

Little baby booties! It was just an oval for the sole, a semi circle for the back, a small circle for the front and a couple of strips for the laces, but it gives a great effect. Oh and I nearly forgot the strip around the edge of the sole to hide the join :)

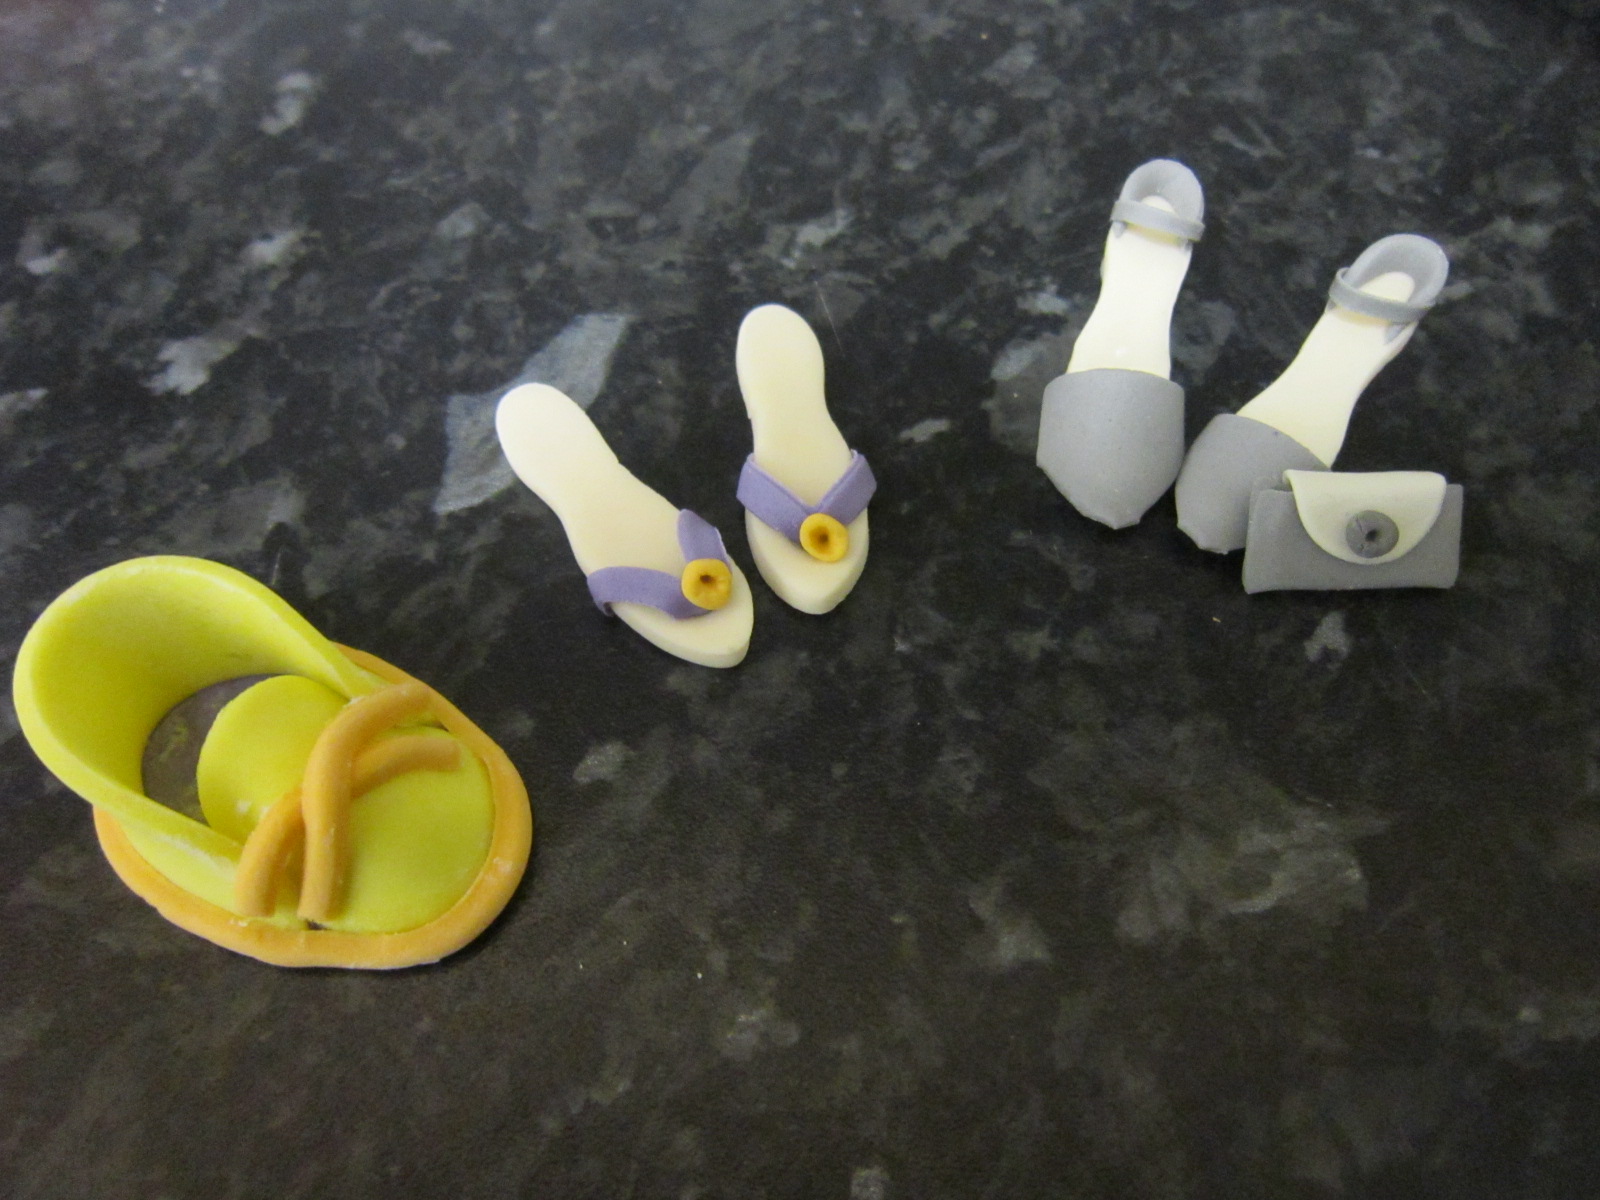
We also covered flip flops, which needed proper shoe cutters:
I quite enjoyed these once I got the hang of them.

The straps are a little bit complicated, as you have to put the v-shaped bit of icing on backwards and then fold it over itself without it either breaking or coming unstuck, both of which mine kept doing plenty!

Then there were the heels:

Complete with a little clutch bag.

I struggled a bit with these as they were so fiddly, but I think I'd do better if they were bigger. Although I suppose the bigger they are, the better you have to do them as the mistakes would show more!

Everything together.

I should mention that I did all these with modelling paste. I've now found out the difference between sugar paste, modelling paste and flower paste. It is all to do with the amount of glue in the icing. Sugar paste is just your normal icing that you put over a cake, it's quite soft and pliable and tears easily. It also doesn't set very hard. Modelling paste has a little more glue in it and so sets harder and makes models stronger. Flower paste is best for flowers (obviously!) as it contains the most glue and sets really hard, so you can roll it out thinner for petals.

Flower paste came into play in this week's tutorial, which was poppies. And what a vast amount you need just for one poppy! Flower wire, flower tape, black cotton (I missed this off the list and had to borrow someone else's, d'oh!), flower paste, dusting colours and icing colours! All for one flower. And that doesn't include all the equipment either, like the rolling pin (I couldn't roll it out thin enough; flower paste is like pastry, you roll it out and it just seems to spring back into shape again), kitchen paper for the dusting colours (I forgot to bring this and all, had to borrow some from someone else), all the modelling tools, brushes, cornflour (I seem to get through a ton of this stuff. I was looking around at everyone else and they were moulding their flower paste easily with their bare hands - whenever I do that it just gets sticky and wet and I end up with paste all over my fingers like a chewing gum disaster! So lots of cornflour is required for me.)... anyway, eventually I managed to produce this:


Not bad for a first attempt, I reckon.

So there you go, this is what I've learnt.

Here's a few of the other things I've been up to recently:

More lemon cakes.

My first ever carrot cakes with cream cheese icing! I loved the carrot cakes (I've never had them before) and this recipe was from the Primrose Bakery (yes, them of the stodgy cupcakes of days past) which actually came out right this time. Soft and lovely. Shame about the icing though, I'm definitely not a fan of cream cheese icing.

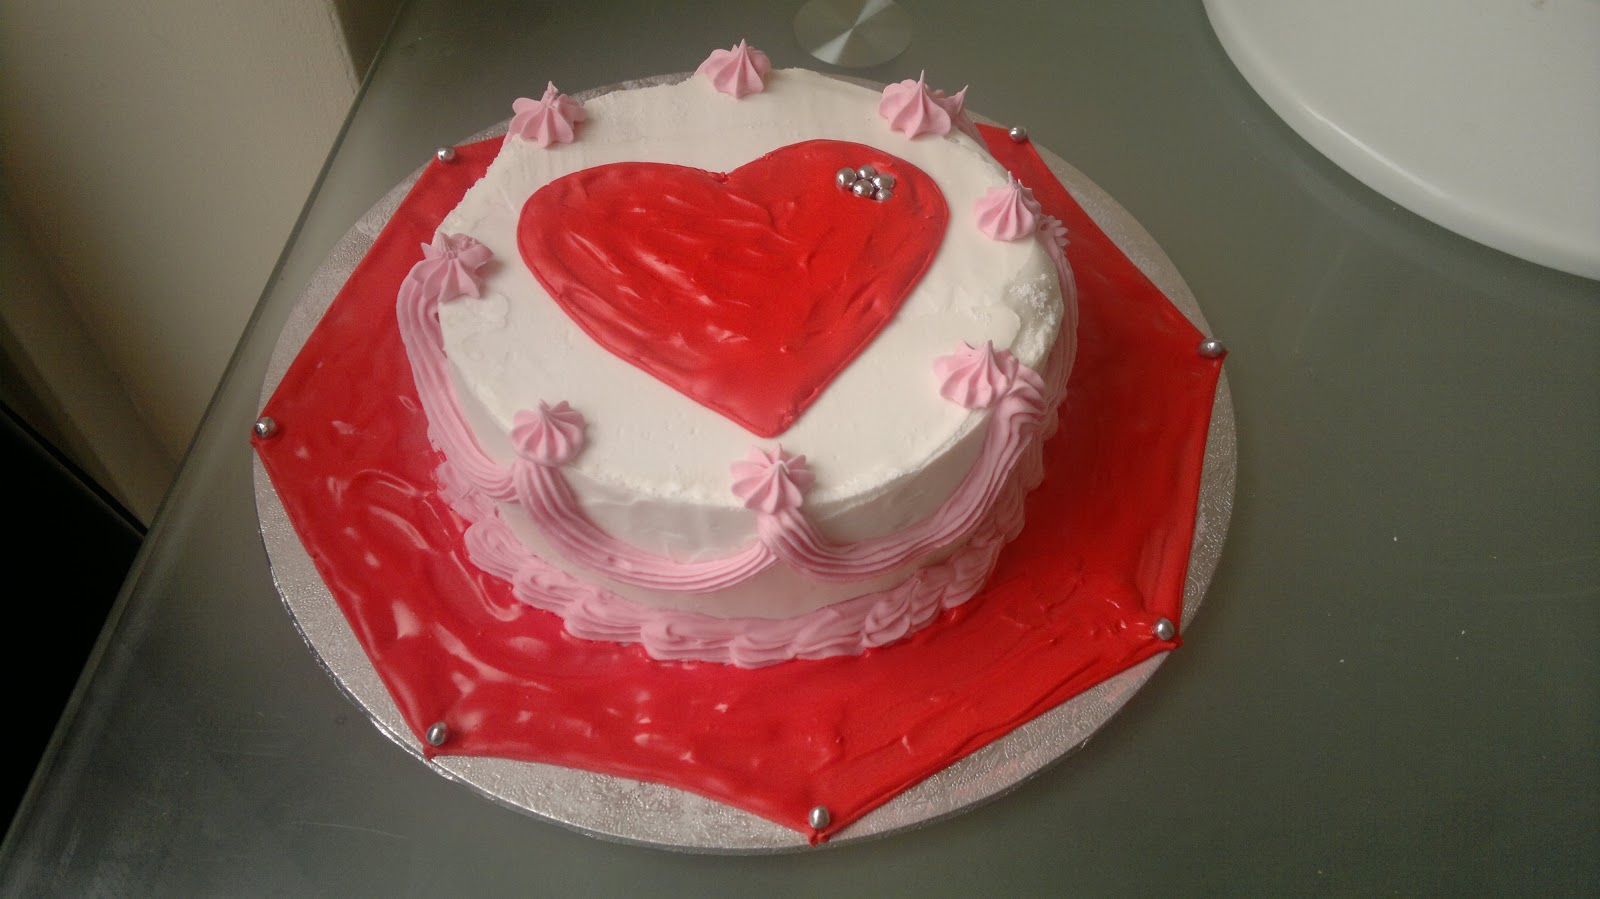
Nothing like a plain old cake. I couldn't resist using the heart shaped tin though :-D

I thought I'd try a new recipe. This is spiced marmalade cake from "200 Cakes and Bakes", one of my favourite recipe books.

You've got to try rainbow cake!

This one came out a bit stodgy, but tasted good nonetheless!

Nom nom nom...


Thursday, 26 April 2012

What I done at school this week

Well, I didn't win the Easter competition, but quite frankly I didn't expect to. The other entries in the finals were amazing! But the cake was most delicious ;)


Anyway, I don't know if I've mentioned this in a previous post, but I've enrolled in a cake course at my local campus. It's a ten week course with a class every Monday evening. So far I've done two weeks - the first was just an introduction with information on what I'd need to bring and the things we'd be doing. I went for the advanced course, but apparently that and the improver's course weren't very popular (which surprised me as I thought cake decorating was really fashionable at the moment) so they have merged the two courses into one. There's still only about 6 people on it though!

So the second class was this week, which covered how to make a lavender sprig and how to use stencils. The lavender was actually started on week one - we learnt how to make each individual flower head and that was our homework... to make 16 of them! I managed but it's fiddly work, it involves making five little rice-shaped 'petals' for each flower head - that's 96 in all! Just for one sprig! It just goes to show how people can easily justify charging hundreds of pounds for a high quality cake with sugar flowers. The amount of work that goes into it is phenomenal.

It was the first time I've ever used flower paste as well, when I made roses I stuck with fondant (also known as sugar paste) and they never really dried out properly. The flower paste has more glue in it which makes it stronger - you can roll it out thinner and it dries harder.

So here's my fully formed lavender sprig:


Not much considering it was at least 2 hours' work. But hey ho, it's given me the chance to try something new.


Then there was stencilling. I'd been instructed to buy some dusting colours for this, and also for the lavender, so the colours I bought were 'Foliage Green' and 'Lilac'. The green said it was edible, and the lilac said it wasn't edible, but only 'non-toxic'. I couldn't find any lilac that was marked as edible. I don't know if that means it's not available or what. I'm sure I'll find out.

I was really pleased with how my stencils turned out, so much so that I've bought a load off eBay today! Although the second time I tried one of them, I put it upside-down, so it got all smudged from the powder left over from the previous attempt. They also ended up a bit battered after being carried home in the box:

Together with the lavender.
The first attempt (sat on a rubbish half eaten cake.)

The smudged (and squashed) second attempt.

Quite possibly my favourite of the three.


Next week: shoes!


Friday, 13 April 2012

Easter Competition

I'm a finalist!!

http://www.facebook.com/media/set/?set=a.315602458505848.71737.115300861869343&type=1

Hopefully you can see this... if not then go to Facebook, find the Cake Masters page, like it and check out the 'Easter competition - Bake for Fun Finalists' album. My basket cake is there!

Ooh I'm all fizzy with excitement :-D

Tuesday, 10 April 2012

Easter Basket Cake

Well, Cake Masters have had another competition on for Easter. I don't think this one has a prize, but I thought I'd give it a go anyway.

Ever so original, I thought I'd have a go at an Easter basket style of cake, as there is a technique of piping butter cream where you can create a basketweave effect which I'd not had a go at before. I think you really need a special nozzle for the job but I made do with one of the plastic ones I got with my piping kit from Hobbycraft - it seemed to do the job.

I wrapped the sides of the cake with fondant icing before piping on the design, so that the sides were even. On the top is chocolate butter cream (which you can't actually see under all the decorations), many many many Creme Egg Minis (thanks Cadbury) and three chicks made from fondant. I added some flowers and leaves for a bit of colour:


The piping was very fiddly and didn't come out as neatly as I'd have liked. I think I got the icing consistency wrong as it kept curling up as it came out the nozzle. But I was pleased with the overall effect, even though I got butter cream all over the kitchen floor (it kept coming out of the top of the bag!)

I was going to add a handle, but I didn't think a fondant one would keep its shape, and I didn't want to spoil the fact that the entire thing is edible by making one from cardboard, so I just left it.

Still, not bad for a first attempt at a basket, I like to think.

Monday, 9 April 2012

More cupcakes

Another mate/colleague had his last day at our company recently, and since he's a big fan of F1 and cars in general I had a go at these:

It's the first time I've tried recreating an image with fondant... I made templates with baking paper and used those to cut round. It was fiddly but I think I pulled it off! :-D

I made two separate templates for the helmets, one for each colour, then fitted the pieces together. It was harder than it sounds as the black fondant stretched as I lifted it up so I had to trim it to size as I fitted the pieces together.

The wheels were done using circular cookie cutters, silver spray and the end of a large piping nozzle to do the smaller holes.

The written message was just to use up the royal icing left over from my previous cake. :-)

There was plenty left as well. Enough for these:


Friday, 6 April 2012

Royal Icing

So I finally got sick of the sight of the half finished cake that was sitting on the table for days and decided to complete it. I just rushed through it as I'd lost the enthusiasm.

Here's how it looked after I'd finished applying the royal icing. I don't think Ceri Dz (who did the YouTube videos I learnt the method from) would be particularly proud of it...

I used up the rest of the royal icing to pipe on a design and used the flooding techniques learnt from Elaine McGregor to do the heart and a collar on the board.

The icing was still wet when I took the photo...


The cake was nice although half of the icing got left behind as it had set so hard. I nearly had to get a saw out just to cut a slice!