Monday, 19 November 2012

Battenberg!

I've decided that I need to concentrate more on baking methods for a while, rather than just decorating. Plus after the wedding cake experience I'm all decorated out, so to speak. For a little while anyway.

So I've been on Amazon and bought myself a little pressie - Rachel Allen's Cake, and gave her Battenburg recipe a go. It surprised me in that the cake itself was just a basic Victoria sponge recipe; it was the method that was the tricky part. I had to separate the batter into two batches so one could be coloured pink (harder than it sounds - I had to try and stir the colour in thoroughly without knocking all the air out of the mixture.)

The batter then had to be put into a square 20cm cake tin which had a folded parchment separator in the middle to give it two compartments and therefore produce two rectangular cakes, one of each colour. Trying to get the first lot of batter in without the paper collapsing was the tricky bit! Once the second lot was in, each side kind of held it up so the only trouble was making sure it stayed in the middle.

Whilst baking, the paper did seem to drift off to one side, so I ended up with one wide short cake and one narrow tall cake! But with a bit of trimming, I was able to fix this.

Half a jar of apricot jam and far too much marzipan later, this was the result:

Not bad for a first attempt, I like to think!

Monday, 24 September 2012

Wedding Cake - Cascading Roses

So here it finally is, my first ever wedding cake!


I decided to go for the cascading roses style, as that is quite popular at the moment; and it was quite handy as the decorating theme for the reception was roses too, as you can see from the table! I had already known the colour scheme was red, but I hadn't known about the roses theme, so it was quite lucky really. :-)

I originally made the (49!!) roses on cocktail sticks, with the intention of using them to stick them to, or rather in, the cake. But because there ended up being so many of them I felt uncomfortable with the idea of so many cocktail sticks being stuck in there; it seemed a bit unprofessional; so I took them off the cocktail sticks and stuck them on with royal icing instead. I was terrified that they wouldn't stay stuck and would fall off during transport, but the cake was well packaged in a box bought from www.craftcompany.co.uk (expensive for a box, but well worth the money), so they were all OK and the cake made it to the reception in one piece!

I was especially proud of the fact that I manage to cover all three cakes with icing on the first attempt without any tears or folds, and on the bottom tier I managed to cover both the cake and the board in one go! Yay me! :)

Here is a close up for you:


I have to say I thought I'd lost interest in cake decorating, until I made this cake and heard the reactions of all the people who were impressed by it. I know there are much better cakes out there, but I can't help but feel a little warm glow when I look at this one.

PS. Apparently it was delicious too.

Saturday, 22 September 2012

Wedding cake

So I finished the wedding cake, after a week off work and several moments of panicky 'I can't do this!!'

The wedding is today so I won't be showing any pictures until later ;-) but I can tell you I made nearly 50 roses in the end! I ended up buying a 5 petal cutter to make the job slightly quicker, but it still takes time! The trouble is, I can't cut out all the petals at once as flower paste dries out so quickly, so it's a fiddly process of rolling out the paste mega thin (I bruised my hands doing that!), cutting petals, frilling them, wrapping them round the cone, then back to rolling out more paste. Sounds a quicker process than it actually is.

This was also my first experience of stacking cakes - as it was a 3 tiered job I had to put dowels in the bottom cake to support the two above it. As the middle tier was a dummy cake I didn't have to put dowels in that, apparently. If that had been fruit cake as well then I'd have had to use dowels in that one too.

The cake itself was Delia's own rich fruit cake recipe, found here.

After hours of watching YouTube tutorials on how to ice a cake, I managed to get the icing on all three without it ripping. I even managed to ice the bottom cake and board in one go! Yay me!

The bride's reaction was apparently good, although I didn't get to see it, but I'll see her later so I'll know then. :)

All in all, a bit of a confidence booster in the end.

More on this cake, including pictures, later this weekend.

Monday, 3 September 2012

Coming soon...

I spent an hour and a half making roses out of flower paste today. 90 mins of work gave a grand total of four roses. *Sigh*

I can understand now why people charge so much for cakes. If they've handmade a whole cascade of roses, that's going to be several hours of their time! It's not just about ingredients (although flower paste is expensive and all!)

Anyway, today's rose making exercise was the start of my latest project - I've got a wedding cake to complete by the 22nd September. Actually, that wasn't the start, I've already baked the top and bottom tiers - the middle being a dummy cake, else they'll have more fruit cake than they'll know what to do with.

So this is my first attempt at a wedding cake, and I must admit I'm cacking it slightly... I need more practice at roses! I've been given pretty much free rein on the design too, with just a colour scheme to work towards, so I'm still not entirely sure how the end product is going to look.

So I will try and keep you all updated with my progress, but without giving too much away at the same time. I want to keep it as sort of a surprise. Not that I think the recipients read this, but anyway.

Wish me luck!

Wednesday, 15 August 2012

Substitutes for Rejuvenator Spirit

I've noticed a lot of people have found my blog through Googling the search term 'Rejuvenator Spirit Substitute', or something to that effect.

Well, if that's what you are looking for, I can tell you this much from what I have learnt myself.

Rejuvenator spirit is mixed with powdered colours and Superwhite to paint on fondant, rather like mixing poster paint with water.

You can also use either:

1: Vodka or another clear spirit - any alcohol would have evaporated by the time the cake is eaten and the best thing about it is that it dries really quickly without making your fondant all sticky. This can make it a hindrance though - like rejuvenator spirit itself it can start drying as soon as you have mixed it with the colour so you have to be quick!

2: Water. Yep, you can mix up your powdered colours with water to create an edible paint. This has the opposite up- and down-sides to vodka/spirits: It won't start drying as soon as you mix it with the powder, so you have more time to spend on your painting, but it can make your fondant very sticky, especially if you use too much. It also takes ages to dry.

Having done cocoa painting before now, which involves painting in different shades of brown using cocoa powder mixed with melted cocoa butter, I'm wondering if you could mix any colours with melted cocoa butter (or white fat). Hmmm. If you can, the disadvantage to that would be that it never really dries properly and could end up being smeared.

I'll have to try that one.

Sunday, 29 July 2012

Iggle Piggle Cake

So this weekend marks a year since I decorated my first cake.
In case you forgot.

I made two last year. This one was sitting on our bread board. We couldn't make any sandwiches for 3 days!


My little boy turned 2 yesterday and his favourite character at the moment is Iggle Piggle from In the Night Garden. (It was Little Charley Bear right up until about 3 weeks ago, and that was the cake I was going to do, but he changed his mind all of a sudden).

Basically it is a vanilla sponge with jam and butter cream filling, covered in fondant icing coloured green. The Iggle Piggle design is done in Royal Icing with the flooding technique.


You can't really see in the picture that the fondant was pale green, but it was. I was a little disappointed to find the morning after I made it that he had a dent in his chin, but that was the only major fault with it; except maybe that there was a split in the fondant on one of the corners - I need to practise covering cakes with fondant but it's not something I get much opportunity to have a go at. 

The cake itself is actually two cakes with one edge cut straight and then pushed together. You could still see the join after it was iced but not majorly. I need to work on that it seems.

By the time I had finished the flooding, I had to do the writing but I was shattered by that point and getting somewhat bored, so it was a little rushed and therefore not that neat, but I still think it looks OK. Honest.


Iggle Piggle and Little Charley Bear are © and TM of the BBC

Tuesday, 19 June 2012

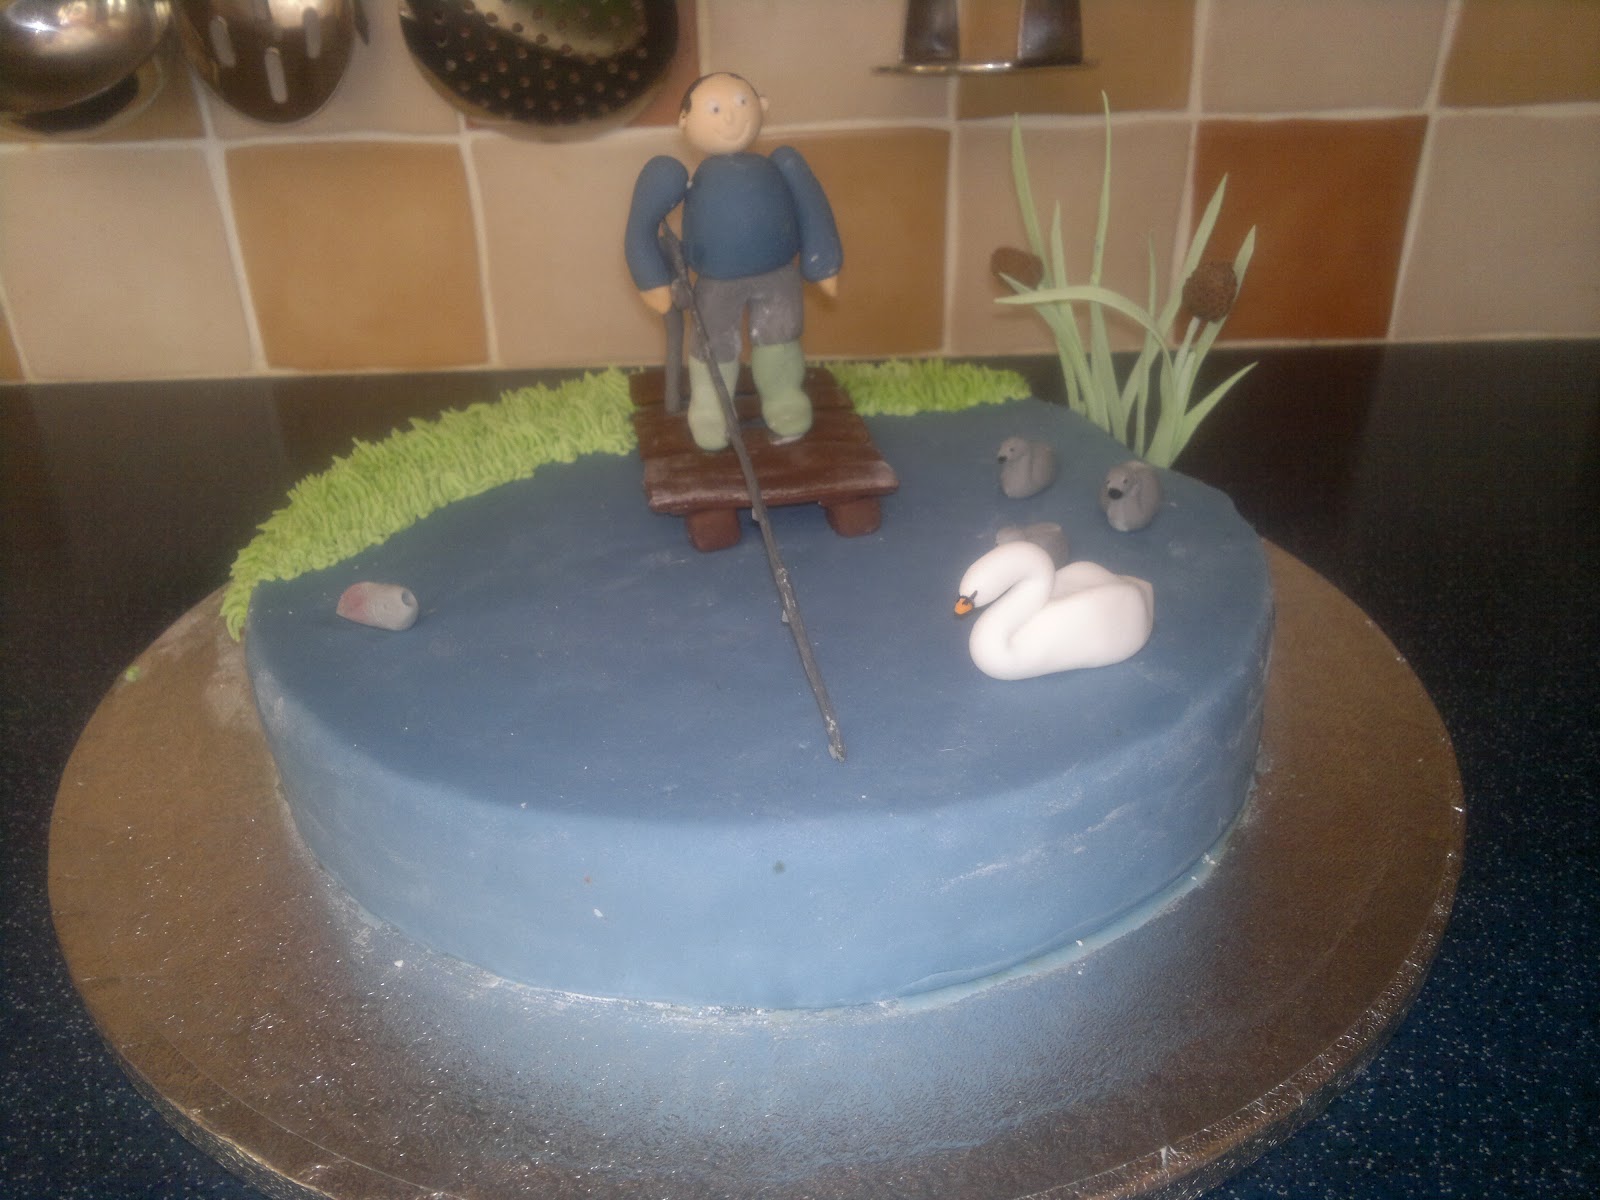
Fishing Cake

I went to visit my great aunt and uncle in Scotland a couple of weeks ago for a long weekend - the Saturday had a party planned for the uncle's birthday, so I thought I'd take a cake up. He's very into his fly fishing, so that gave me a theme.

I even drew a design on paper first (get me!) although, as with the designs that stayed in my head, it didn't end up exactly as I expected as my drawing wasn't to scale. My plan was to have a 10 inch round cake, half land and half lake, with the fisherman standing at the edge of the water on a platform holding his rod. In the water I planned on having a swan and three cygnets, as well as a little fish at the surface of the water. Around the fisherman I wanted reeds and possibly a tree.

I didn't take any pictures of the first tree that I made (I should really remember to do that by now), but it was a disaster. I made it from white icing with the idea that I would paint it with cocoa powder afterwards to make it a nice brown colour. What a mess that made. I didn't have any white fat (as I've learnt on my course when I did the stencilling, white fat helps powdered colour stick to the icing) so I tried mixing the cocoa powder with a little water so I had something that was the consistency of melted chocolate (note to self, this doesn't taste like melted chocolate... yeuch). But I just ended up with a big sticky mess. I'd made the tree trunk and the green top of the tree in two separate sections and that was the other issue - I couldn't get them to fit together properly.

So I decided that instead of a tree I would have a stump instead, with perhaps a small creature peering out from it. But I still had the issue of not having any brown icing (I forgot to mention I didn't have any brown colouring) and being unable to paint it, so a trip to Hobbycraft ensued, where I was able to get some chocolate flavour icing and I also picked up a grass and hair piping nozzle so I could do some grass as well as reeds.

So I made my stump, and it looked lovely. As it turned out there wasn't enough room on the cake for it anyway. Sigh.

I also made up hundreds (well, it felt like hundreds) of reeds with green flower paste, and ended up only using a few, as I realised I had no way of sticking them to the surface of the cake. I put them along the side instead, and was quite pleased with the effect.

So here we are:

I was so chuffed with the cake - it came out of the oven perfectly flat!


The fishing rod was made with a piece of thick gauge flower wire with sugar paste wrapped around it. I normally like to only use edible ingredients but short of making up a batch of pastillage (which I've never done before) I didn't seem to have much choice with that one as I needed something that would be sturdy.

The grass piping tip got put to good use - that's butter cream grass there.

Little rainbow trout :-)

I was proud of my sugar paste swan.

The cygnets had slightly wonky faces, but hey ho :-)

Good job I had some spare reeds, as these didn't hold up too well during the 400 mile journey!

The fisherman fell over as well, but luckily he stood up again quite nicely, with the help of some cocktail sticks!